If you've ever taken a photo that looked beautiful in real life and flat on your phone, Google Snapseed is what bridges that gap. It's free, it's simple, and it's the editing app I recommend to every single person who joins my online phone photography course. In this post I'll walk you through the five tools I use most, and how to use them so your photos actually look the way you saw them.
Why I edit on my Phone
My phone is always with me. My big camera isn't, especially now I've got two kids. So when I see something I want to capture, nine times out of ten it's the phone that gets it. If it's something really special and the phone isn't cutting it, I'll run inside and grab the big camera. But mostly it's the phone.
You'll notice the examples in this post are a mix. Some are personal shots of my kids and our garden and some are things there were captured for socials for work topics. For me there's a bit of a blur between my personal and work photos, because how I see the world and how I capture it are pretty intertwined. And honestly, that's what makes great business content too.
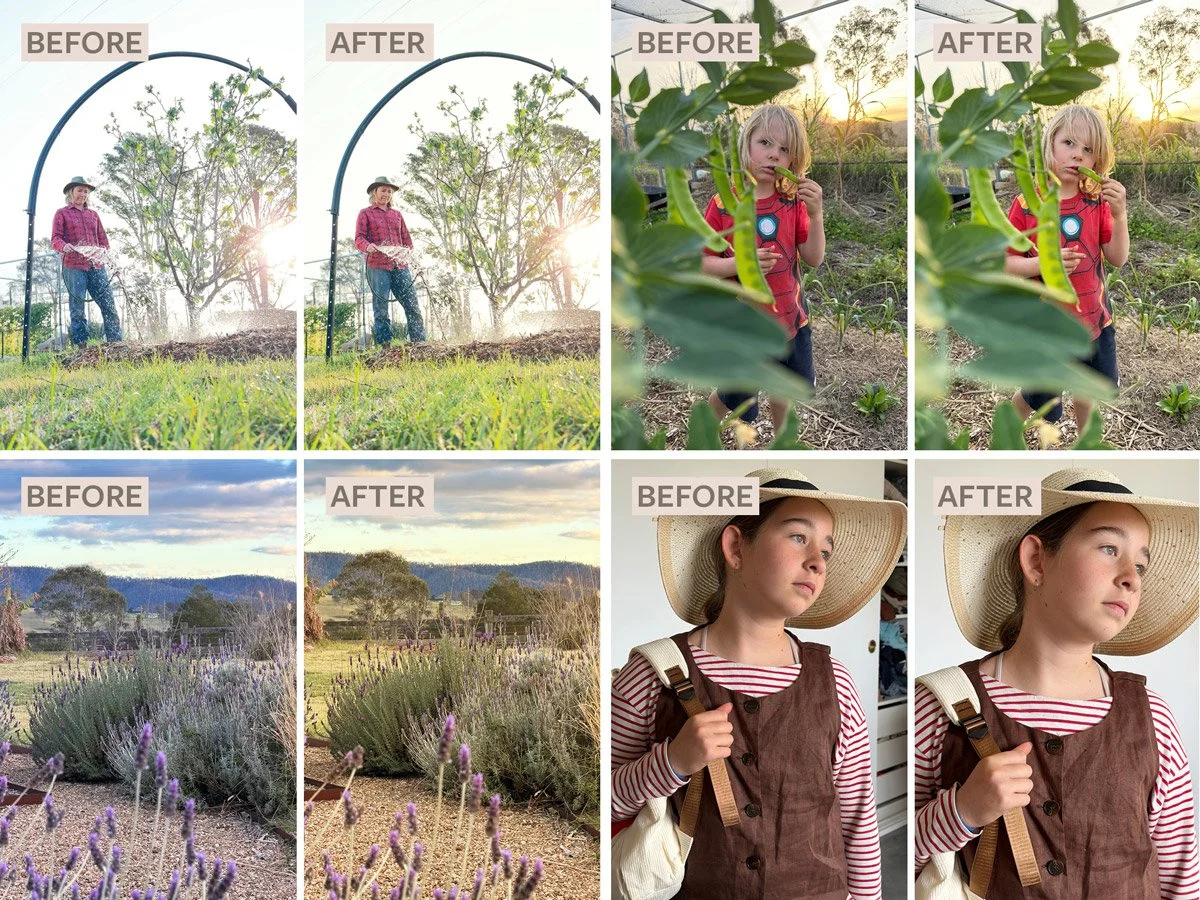
Table of Contents
My editing style: keep it real
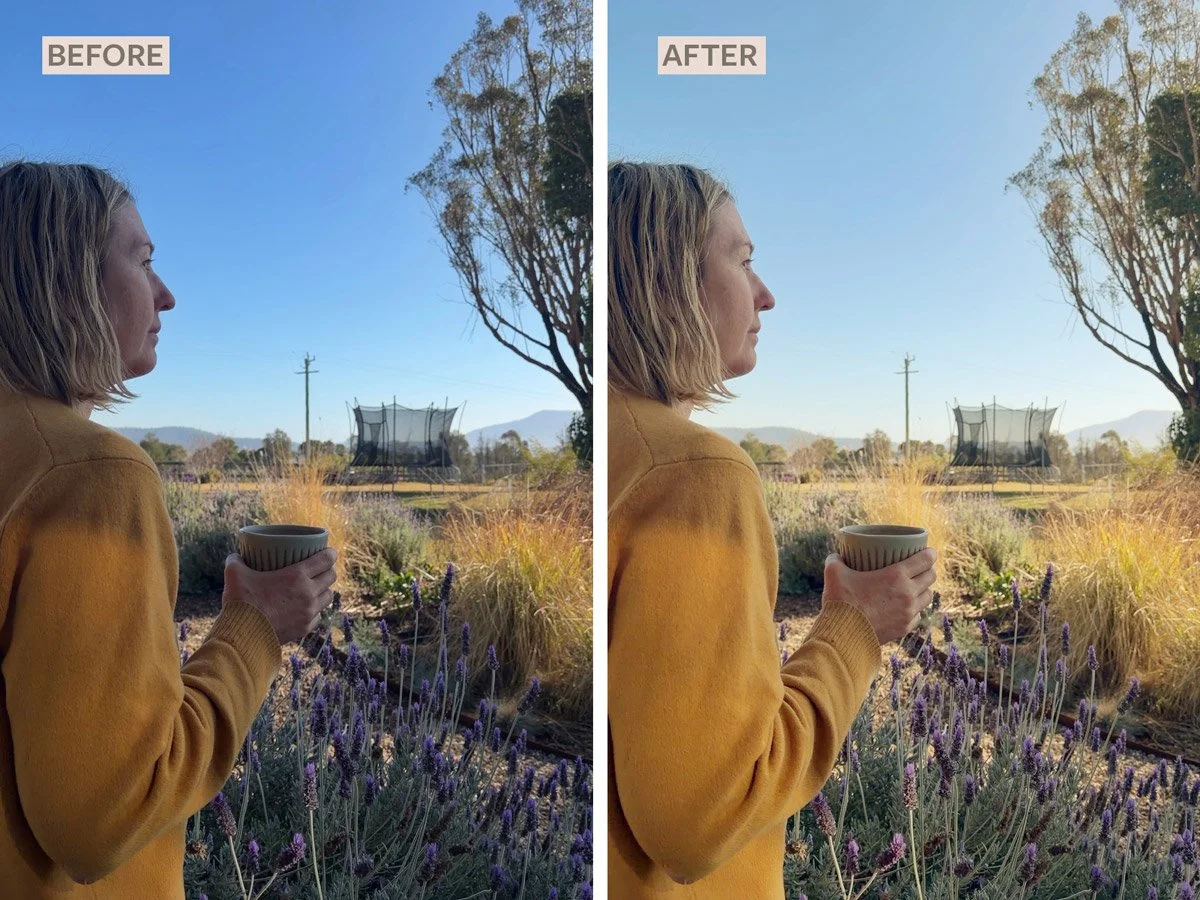
My editing is really, really simple. I'm not trying to make my photos look different to how they were. Most of the time I'm just lightening things a little, adding a touch of warmth or contrast, and straightening any wonky lines. Maybe 10% better than real life, that's it.
The biggest tip I can give you happens before you even open the app: get the photo as right as you can when you take it. If you take a really dark photo and try to lighten it a lot later, the quality drops off a cliff. It might be fine for a quick story, but if you want to use that image bigger on your website, it really shows. So lighten it up while you're taking the photo if you need to, then you only need a little tweak afterwards. Who wants to spend more time on their phone than we already do?
The 5 Google Snapseed tools I use most
Google Snapseed is a free editing app, on both iPhone and Android. There are LOTS of tools in there, which can feel a bit overwhelming, so here are the handful I actually use, in the order I usually use them.
1. Curves: my number one tool
Curves is my favourite tool because it lightens and adds contrast all in one go. I'll be honest, after years of teaching this, it's the one people find the most confusing. But once it clicks, it's the most effective tool in the app.
Here's how to think about it:
You'll see a graph with a diagonal line running through it.
The bottom left end is the dark parts of your photo (shadows). The top right end is the light parts (highlights).
Push a point on the line up and that part of the photo gets lighter. Pull it down and it gets darker.
What I do most of the time is add two points to make a gentle S curve. Nudge a point in the upper half up a little to brighten the lights, and nudge a point in the lower half down a little to deepen the darks. That gives you a photo that's slightly lighter with a bit more contrast, so it looks crisp but still natural.
Keep it subtle. If the line looks like a rollercoaster, you've gone too far.
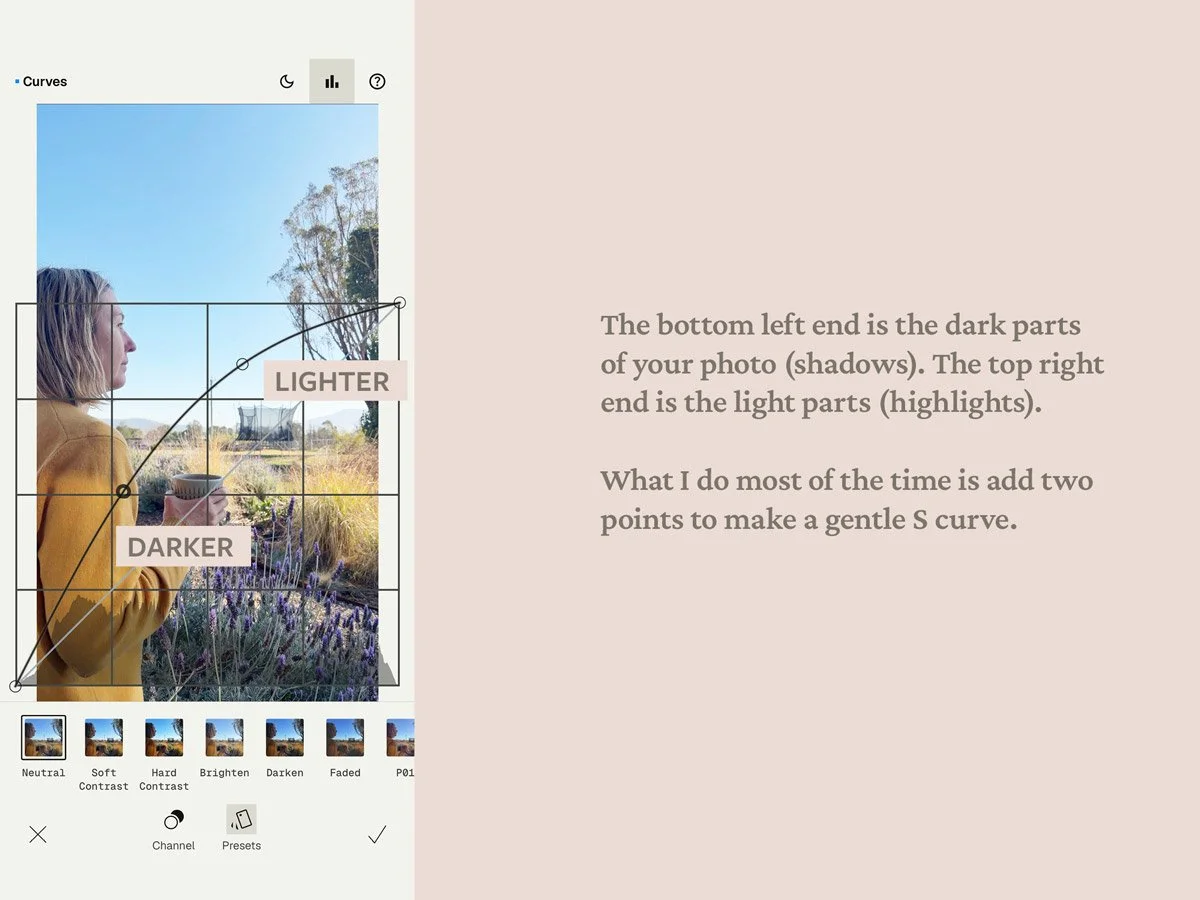
[Image: Curves screenshot showing the S curve]
2. Adjust: the one everyone misses
This is the tool I use almost more than anything else, and it's easy to miss. When you open the tools, it's the first one, top left. Tap into Adjust (it used to be called Tune Image) and you'll find heaps of the basics in one spot: brightness, contrast, saturation, ambience, highlights, shadows and warmth.
The ones I use most:
Brightness and contrast for a small lift if Curves hasn't quite got there
Saturation, very gently, if the colours look a bit flat
Shadows, lifting them a touch if the dark parts are too dark
Warmth, on almost every shot
Why warmth? I tend to shoot in softer, lower light, and that light is usually a bit blue. Blue reads as cold. The opposite of blue is yellow, which is warm, so a small nudge of warmth brings things back to how they actually felt.
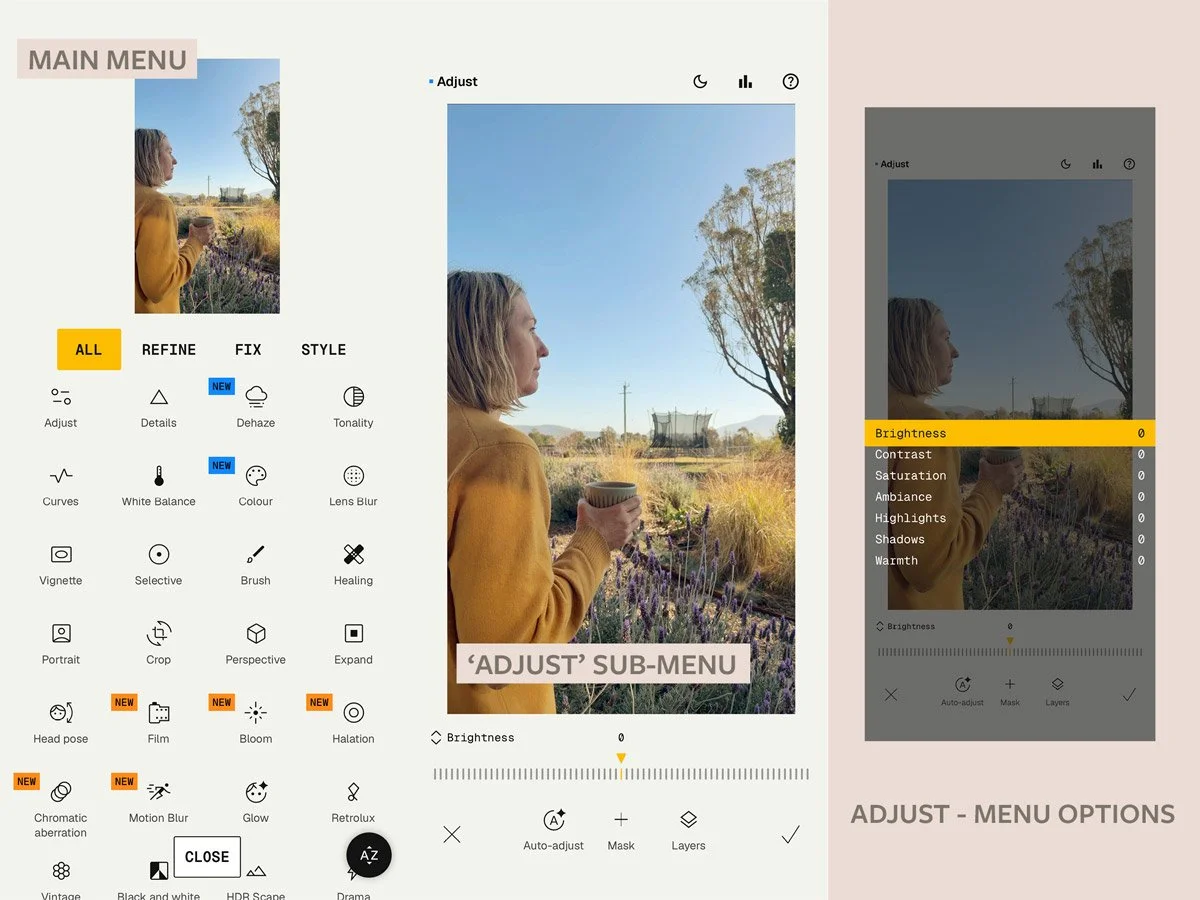
[Image: Google Snapseed menu and sub-menu ‘ adjust’]
3. Crop: cut out the bits you don't want
Simple but so useful. Crop out anything distracting around the edges, tighten up your composition, or change the shape to suit where it's going (square for a post, taller for stories). Choose Free if you don't want to be locked into a set size.
4. Healing: for the odd fix
I don't use Healing often, and I'll be upfront, I find it fiddly myself. But it's handy for removing a small distraction, like a blemish, a power line in the sky, or a stray crumb on a flat lay.
The trick is all in your fingers:
Pinch out with two fingers to zoom in on the bit you want to fix.
Always move around the photo with two fingers. If you use one finger, Snapseed thinks you're healing and paints over wherever your finger goes.
Use one finger only when you're actually healing. The area you touch turns red, then Snapseed blends it in with what's around it.
Use small dabs rather than big swipes. If it goes wrong, hit undo and try again.
It works best on plain backgrounds like sky, walls or grass. Busy patterns or anything close to a person's edge are much harder to get right, so don't stress if it's not perfect.
5. Perspective (Free): straightening wonky lines
Nothing drives me crazier than wonky lines in a photo. A tilted horizon, a crooked table, a wall that's leaning. Phone cameras shoot quite wide angle, which means a bit of distortion. Things look wider and more spacious than they did to your eye, and straight lines can bend or lean.
To fix it, open the Perspective tool and choose Free. Grid lines will come up over your photo. Drag the corners of the image until the lines in your photo match up with the grid. Small moves are all you need. Snapseed fills in the edges for you, or you can crop them off in the next step.
If it's just a tilted horizon, the Rotate tool is quicker.
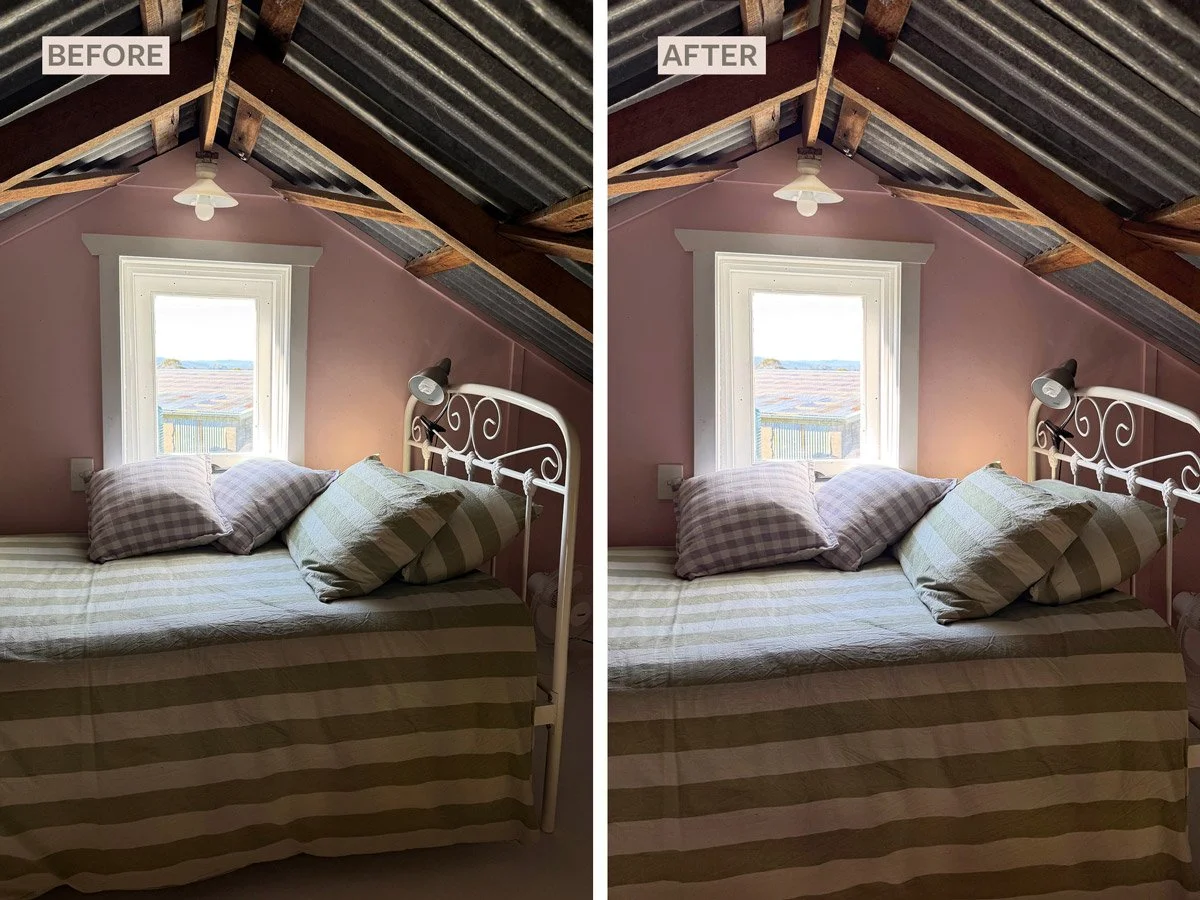
[Image: Mayview BNB - before and after, straightened]
Getting around the app
Before and after: press and hold on your photo to see the original, then let go to see your edit. I do this after every tool to make sure I haven't taken it too far.
Happy with it? Tap the tick (bottom right) to keep the edit.
Changed your mind? Tap the undo arrow at the top to step back.
Saving: when you export, save a copy so you keep your original too.
Want more phone editing tips like this?
Google Snapseed is one of the tools I cover in my Phone Photography for Small Business Owners course, along with everything else you need to take confident, professional photos for your business using just your phone. If this post was useful, the course will take you a lot further.
Or subcribe to my weekly newsletter here - they are like a letter from a business bestie - a mix of inspriation, bts, farm life, interviews with creatives and tips like this.
Frequently asked questions
-
Yes. It's free, there are no ads, and you don't need to touch most of the tools to get a great result. Start with Adjust, where brightness, contrast and warmth all live in one spot, then give Curves a go once you're comfy. Pressing and holding to see your before and after makes it easy to check you haven't gone too far.
-
They do different jobs. Canva is brilliant for designing with your photos, like social posts, flyers, adding text or your branding. Snapseed is a proper photo editor, with much finer control over light, colour, straightening and removing small distractions. I edit the photo in Snapseed first, then pop it into Canva if I'm turning it into a graphic.
-
Not with gentle edits. Quality takes a hit when you push an image a long way, like lightening a really dark photo a lot, and that happens in any app. That's why I always say get it as right as you can when you take the photo. It's also worth checking Snapseed's settings, where you can choose the format and quality your photos save at. Set it high for anything going on your website.
-
Yes, it's my go-to for editing on my phone. For a free app it has heaps of professional level tools, and it's the one I recommend to everyone in my phone photography course. For most business photos, the five tools in this post are all you'll need.
-
A few things to know before you start:
It can feel overwhelming at first, with lots of tools to choose from
Curves takes a bit of practice to get your head around
The Healing tool is fiddly, and it's fairly basic compared to the newer AI remove tools
The layout changes now and then with updates, so tutorials (mine included) can look a little different to your screen
It's a phone app only, so there's no desktop version