
Master Phone Photography for Your Brand: Tips and Techniques

You have a limited budget to spend on brand photography at the moment, but you really need images to promote what you do… this is the chicken or the egg situation most small business owners fall into fairly often.
We’re trying to level up and stand out in the marketplace but sometimes we lack the funds or the time to make this possible.
The answer… take your own photos… I hear you say - “I can’t do that, I’m not creative, I don’t have the time.”
I believe you can create professional looking photos by taking a more structured approach, saving time and money.
Yes, capturing your own photos still takes time, but by taking a little bit of time in the beginning to learn a few tips I think your photos will improve dramatically, plus you might actually have fun!

1st step - get to know your phone camera better.
Learn how to choose your focus + lighten or darken your image before you take the shot. Yes phone cameras really give you that option.
Use grid-lines on your phone to help position and compose your photos more professionally. These lines show up every time you take a photo, two lines vertically and two lines horizontally.

Example of a moodboard I created for my own photography business - lots of nature, earthy tones and a relaxed vibe.
2nd step - Plan + Prep for your shoot
Use a Pinterest board to collect a bunch of photos ideas that could work well for your business. It’s ok to emulate people you love in the beginning, over time you’ll develop your own style.
Shortlist your Pinterest board by going through and working out which images could be captured at the one location, preferably an easy location like a window in your house or a park just down the road.
Now create a photo shotlist all based around one location, the idea is to save time and get maximum content from this setup. Ideas, if you chose a plain wall in your house near a window, could you push a desk into the space, could you hang a make-shift backdrop up, or create a mini ‘how I make this’ scene?… etc.
Write down a prop, outfit list based on your shot list. Remember this shotlist should be your chance to show the person behind the business and some examples of how and what you do. People buy from people and the more you share about your process the more they value your product or service.
The more you pre-plan this part, the less stressful and more enjoyable the photoshoot will be.

This little nook gets used so much for photos portraits, products, etc.
3rd step - Brand photoshoot
Choose a location that has good light at the time you want to shoot. Once you’ve found this winning spot you’ll be able to roll out the same scene each time you need it and just change the content - this is what I mean about creating a ‘formula’, find one situation and make it work so it becomes easy for you. Then once you’ve mastered it move onto another location.
If you have a simple portrait of yourself setup think about changing your outfit a few times so you get maximum milage out of this shoot.
Remember to check the phone camera part way through to see if there’s anything you’ve missed that you don’t want in the shot or you bra or undies are hanging out.
Try using a remote trigger like this one to capture your own selfies without the double chins.
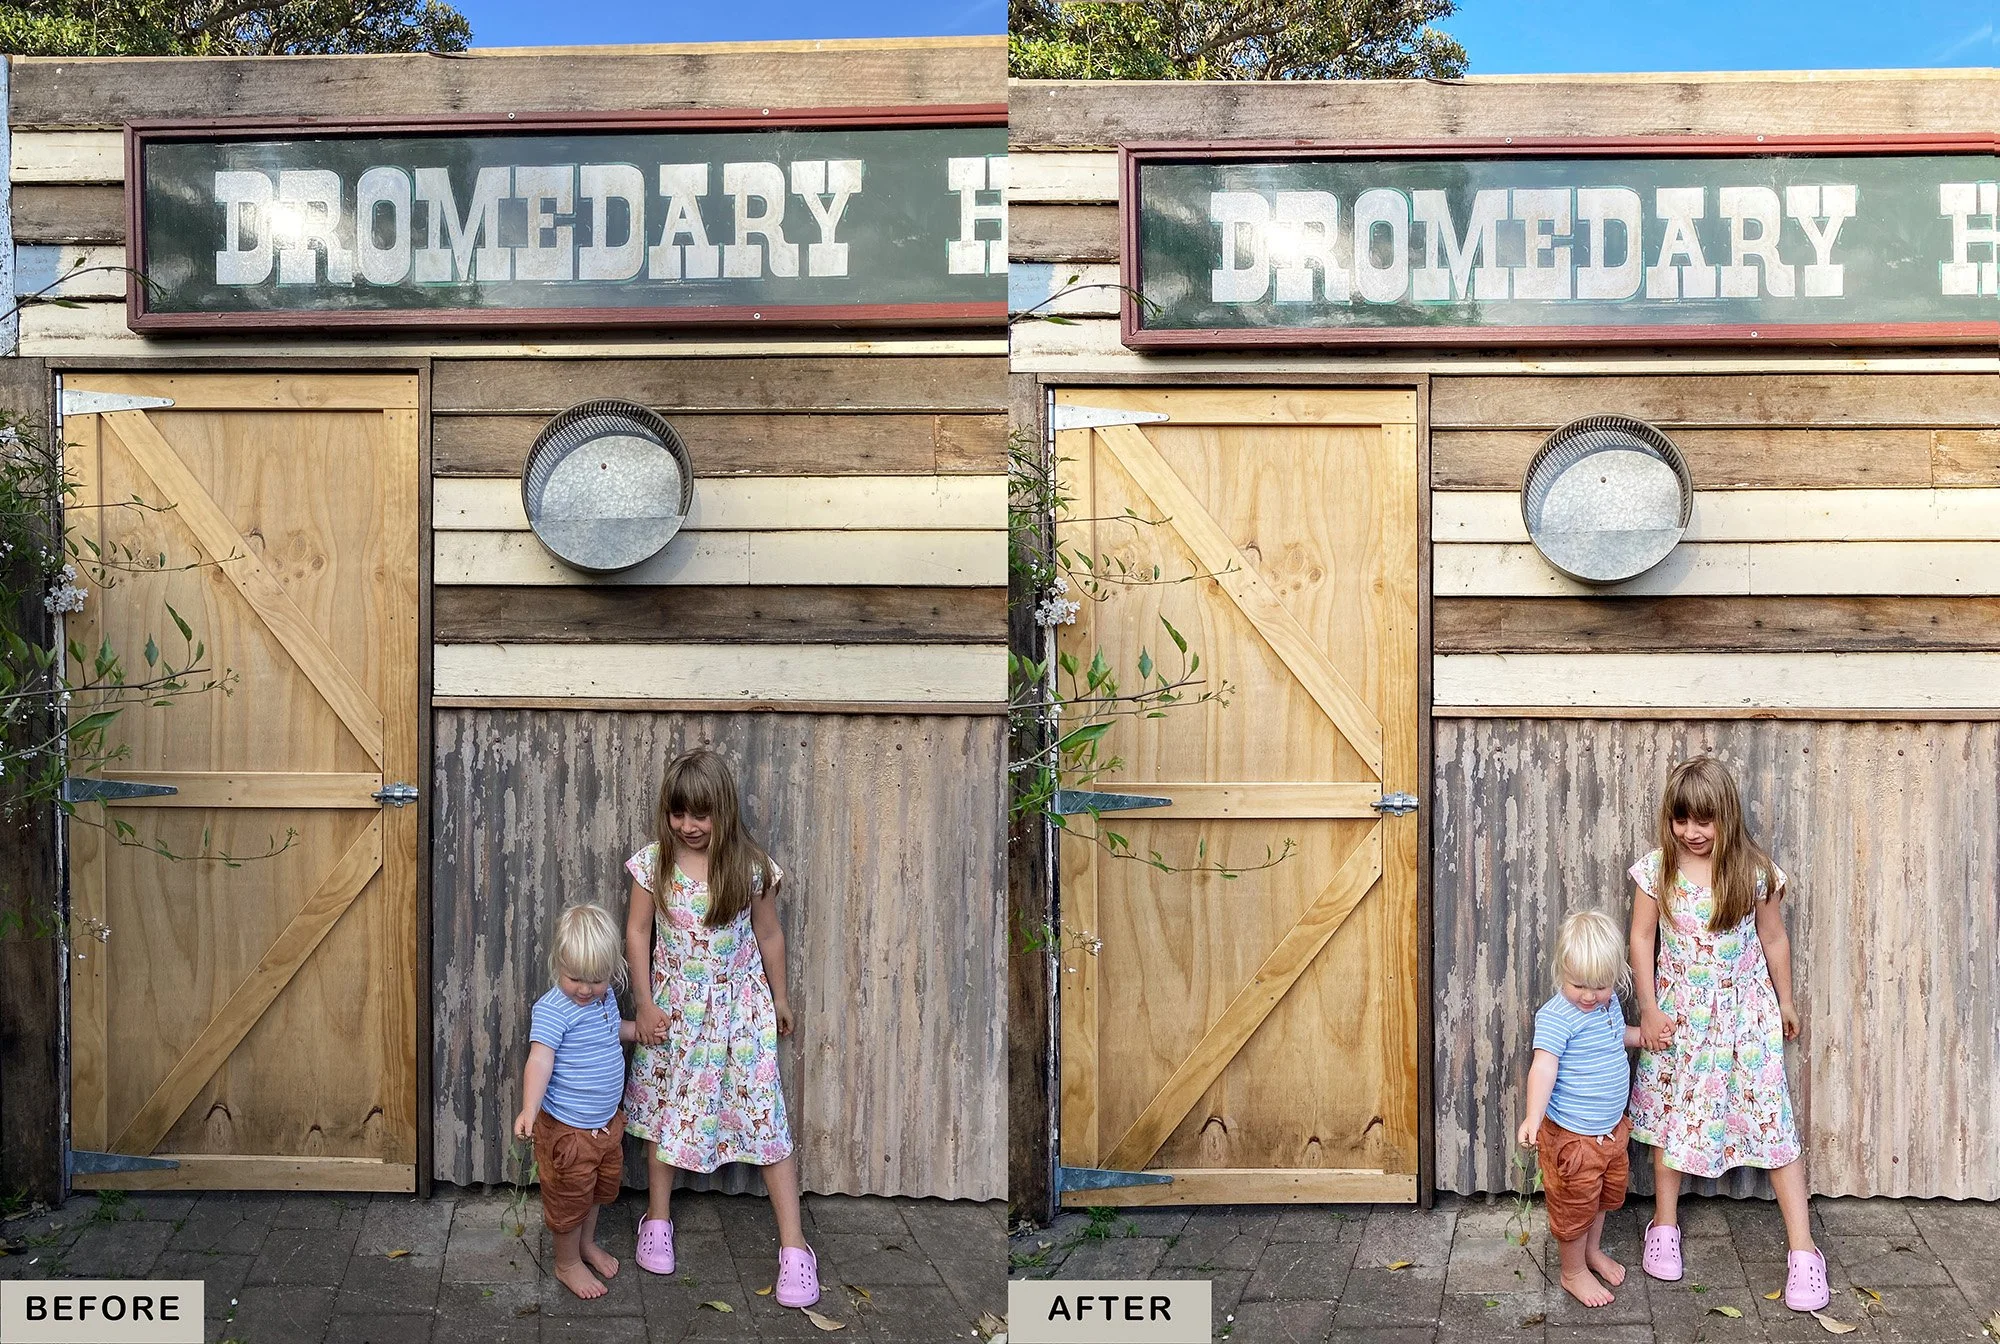
4th step - Edit your photos
Use a free app like Google Snapseed to edit you photos.
Aim to make your photos look 10% better than real life not over the top fake. People like a level of realness.
Using this steps…
Has this article given you some fresh ideas on how to capture your own business photos? Or has it sparked more questions?..
If you need a little more guidance in getting your brand photography on track you could sign up for my online phone photography course for business owners
Or if you prefer in person-workshops you can find out more about the next round of dates here.
Thanks for reading x
